Interactive Filtering
Overview
Interactive Filtering allows users to dynamically remove and include records while navigating their charts in Viewer. Build and combine filters to locate employee records matching specific criteria in real-time.
If desired, users can save their Interactive Filters to their My Filters library, in order to easily toggle them on/off without having to rebuild them. Interactive Filters saved to the My Filters library are unique to each user, and persist between logins.
Accessing Interactive Filtering
Click on the  in the top-left corner of the screen, and then select the Viewer option.
The Viewer user interface is displayed.
Click on the  icon.
icon.
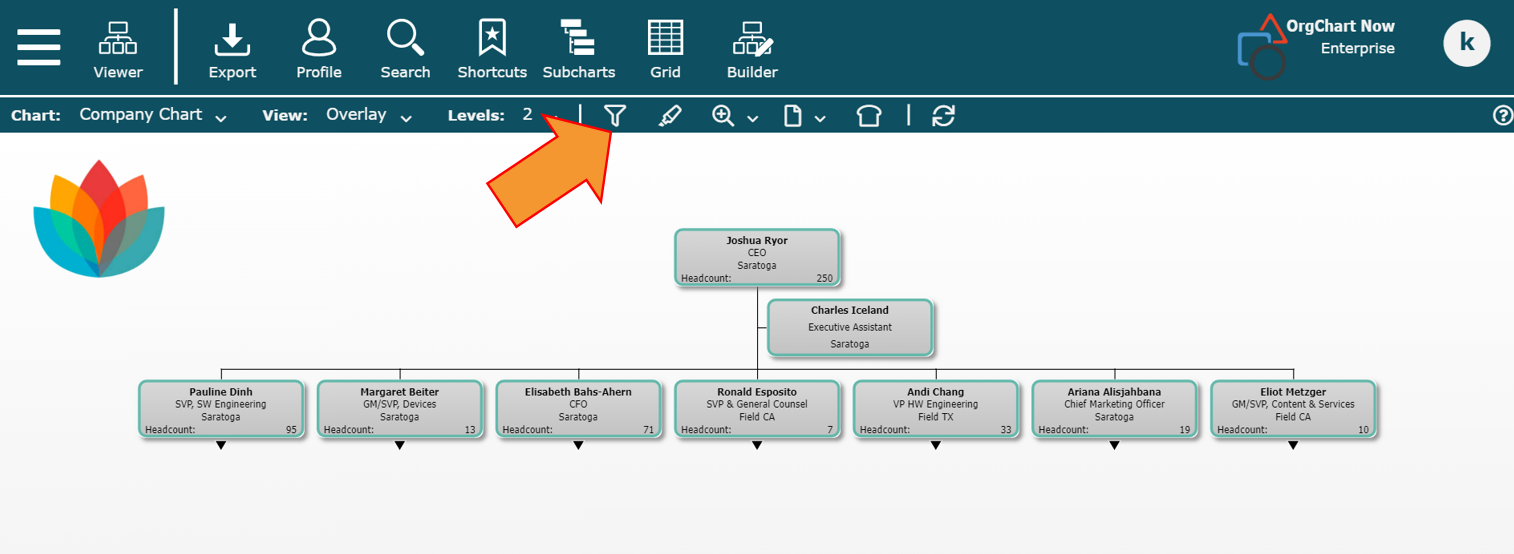
The Filters panel is displayed on the right side of the screen.
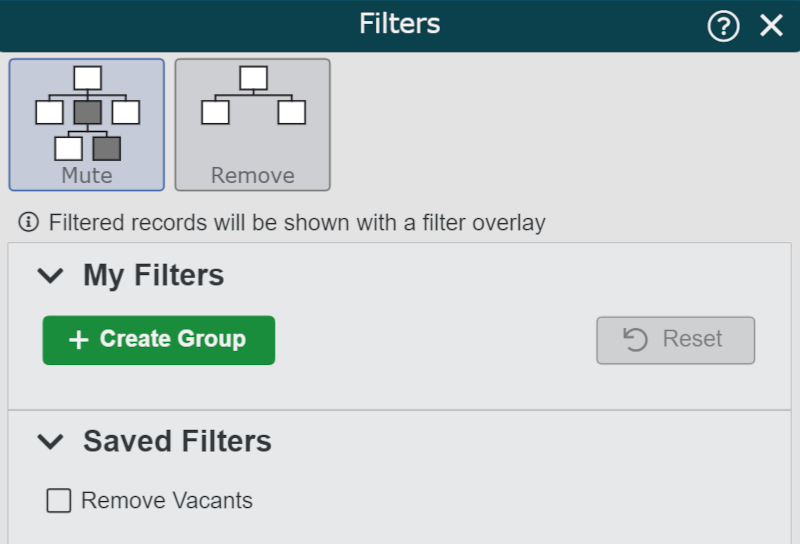
Click on the + Create Group button (under the My Filters heading) to begin.
Building an Interactive Filter
Click on the + Create Group button (under the My Filters heading). A New Group is added.
Click on the
 button to the left of the New Group to expand it.
Click on the + Add Field button, and then search for the filed in your dataset (i.e. Location) that you'd like to filter on.
A List of values associated with the chosen field is displayed in the Filters panel.
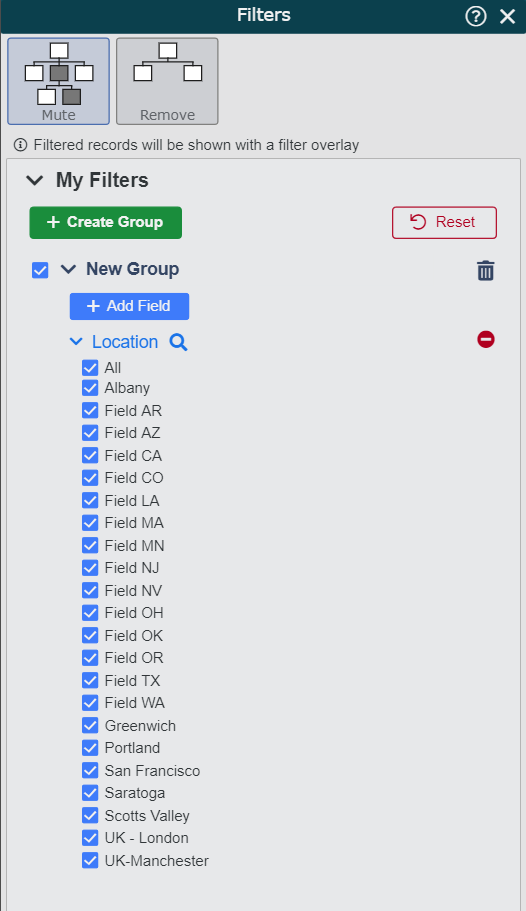
Check the checkboxes associated with the values you want to see in the chart. Employee records matching the checked values are displayed normally.
Note
By default, all values will be checked.
Uncheck the checkboxes associated with the values you do not want to see in the chart. Employee records matching the unchecked values are filtered.
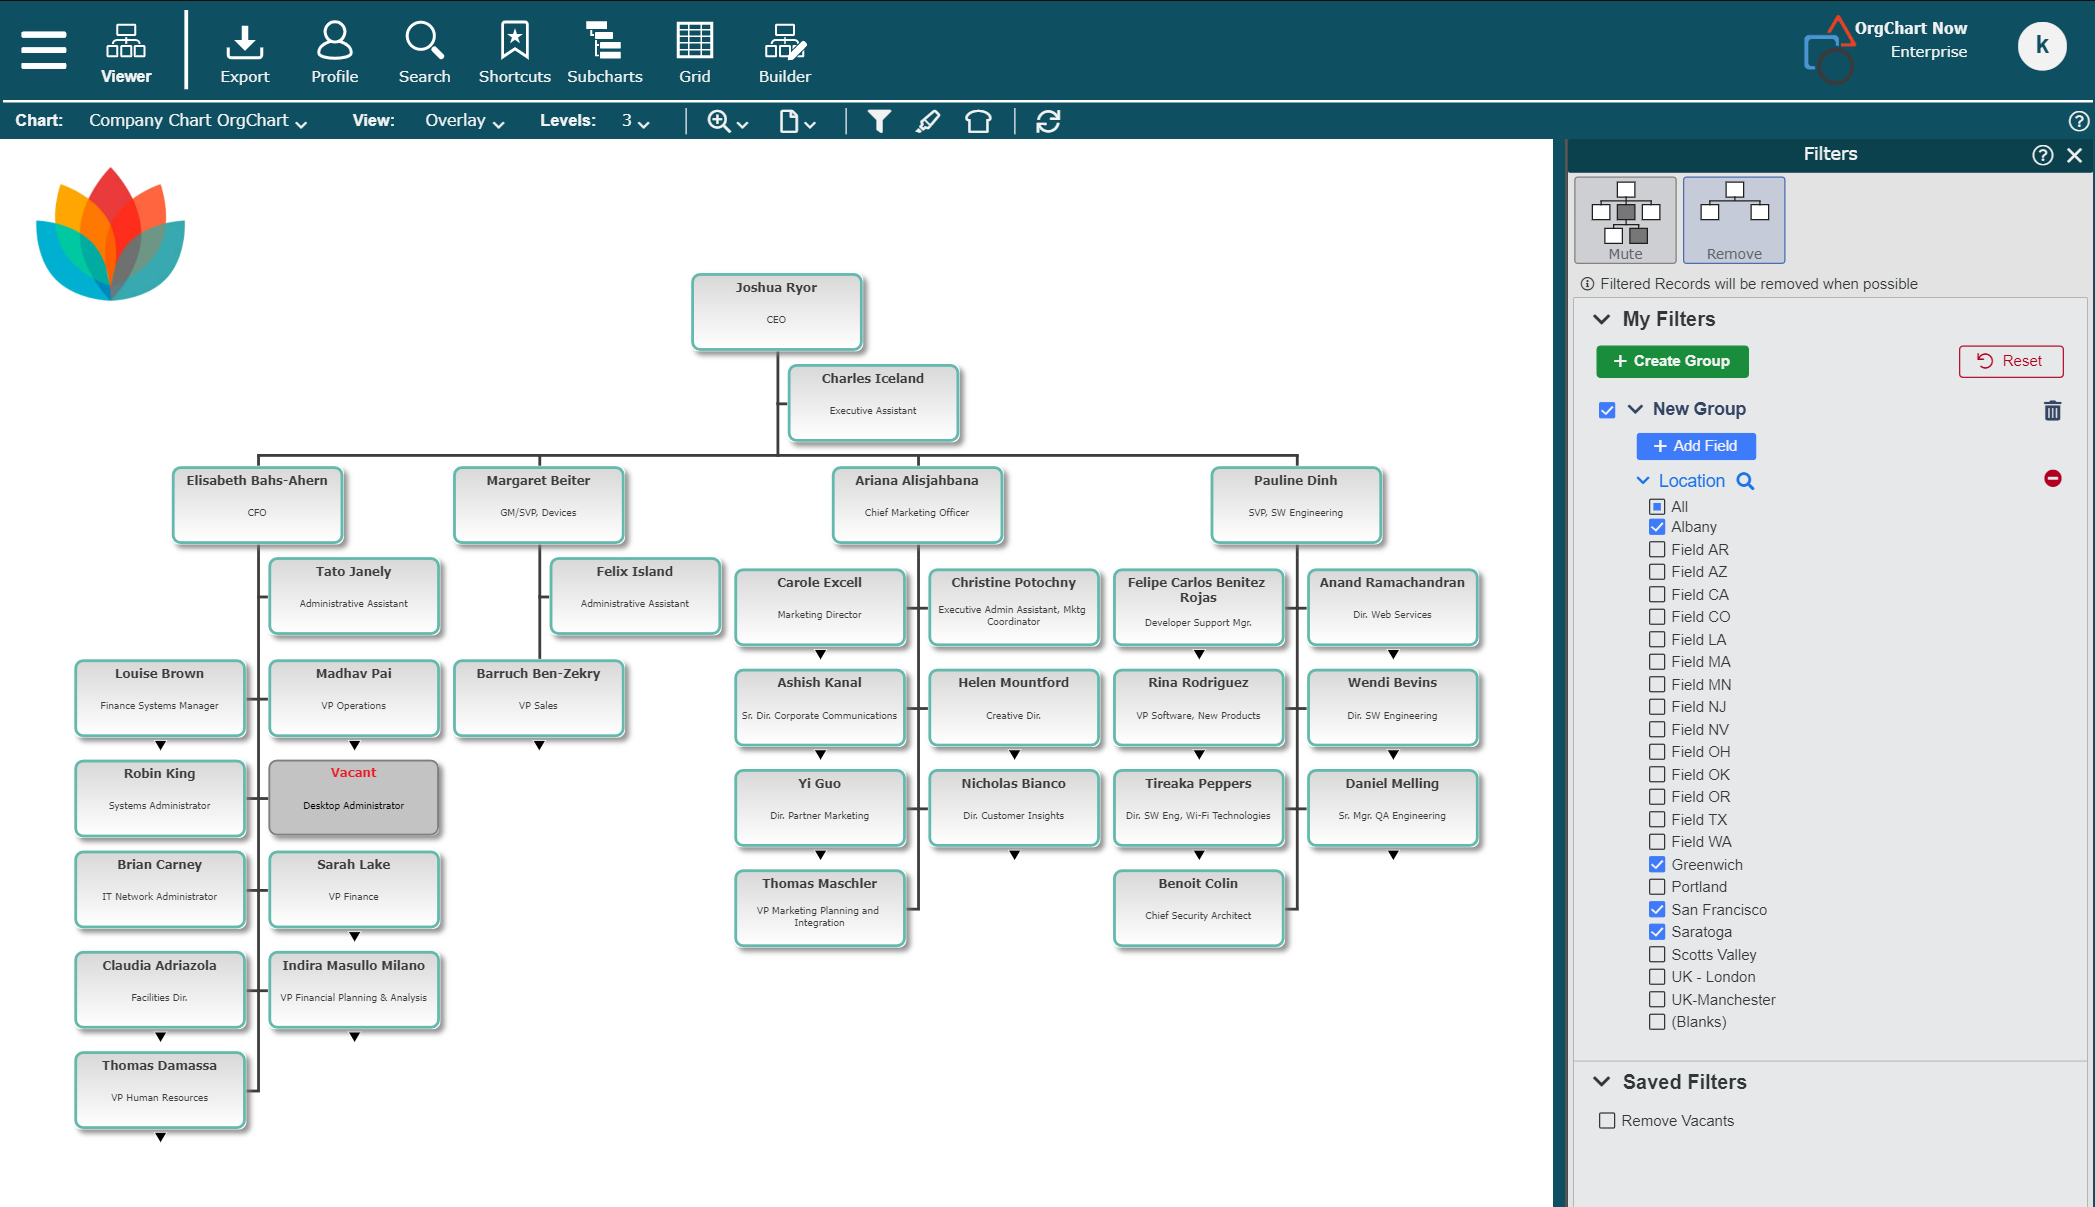
Select to Mute or Remove filtered records by clicking on one of the following icons displayed at the top of the filtering menu:
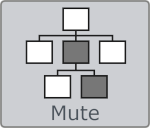
Filtered records will be shown with a filter overlay.
Subordinates that match the filter criteria, but report to a manager who does not, will still be displayed on the chart.
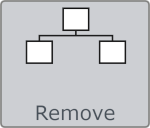
Filtered records will be removed from the chart.
Subordinates that match the filter criteria, but report to a manager who does not, will not be displayed on the chart.
Optionally, repeat steps 3-5 to make a compound Interactive Filter group.
Once you've finished building your filter, double-click on the New Group label to edit it.
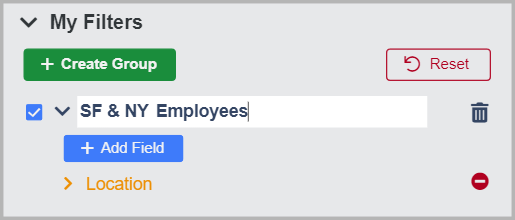
Your Filter group has been saved to your My Filters library. Check the checkbox associated with the filter in order to activate it. Any enabled filters will persist between logins.
Additional Options
The following additional options are available:
Reset | Click to remove all interactive filters from the My Filters library. |
 | Delete Filter group. |
 | Remove field from the current Filter group. |
Unfiltered Branches
When choosing to Remove filtered records from the chart, you may remove all records from your current view. When this happens, OrgChart prompts you to select an Unfiltered Branch to navigate to. These Unfiltered Branches were disconnected during the filtering process, but still contain records that meet your filter criteria.
The following example provides steps for navigating to an Unfiltered Branch.
Open the Filters panel and create a new Interactive Filter.
Check the checkboxes associated with the field values you want to include in your chart.
Note
To spawn the unfiltered branch option ensure that the values that you select do not match an employee record currently displayed on the chart.
Select the Remove filter option. The Unfiltered Branches dialog is displayed.
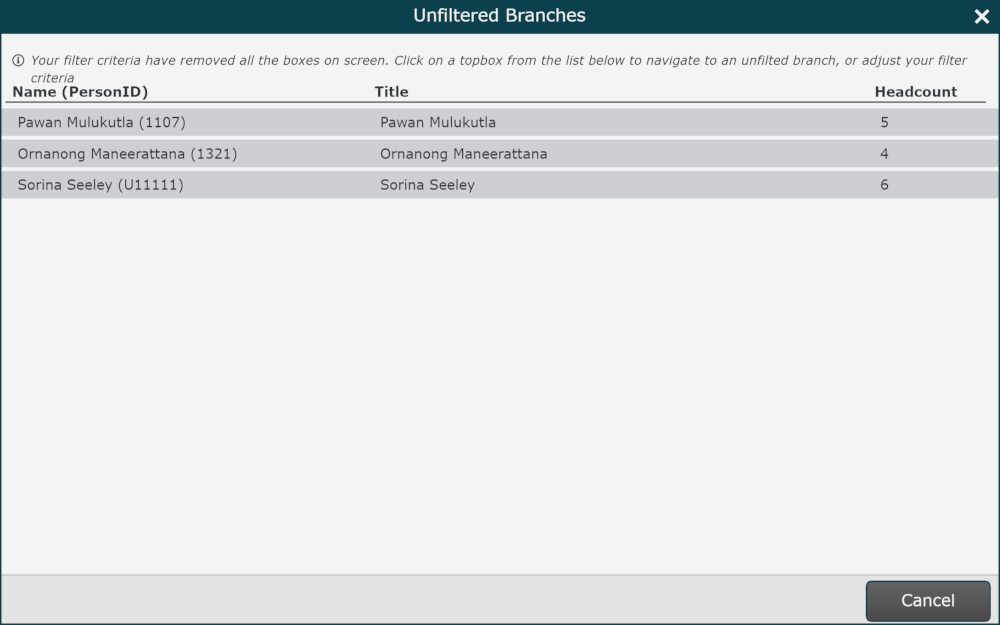
Click on a record in the list to jump to that record's Unfiltered Branch.