Rule Editor
Audience
Audience: Administrators & Read/Write Users
Overview
Administrators and Read/Write users can create new Rules and edit existing ones using the Rule Editor.
Reference the Rule-Driven Charting Example article for step-by-step instructions in creating a View with Rules and Box Styles.
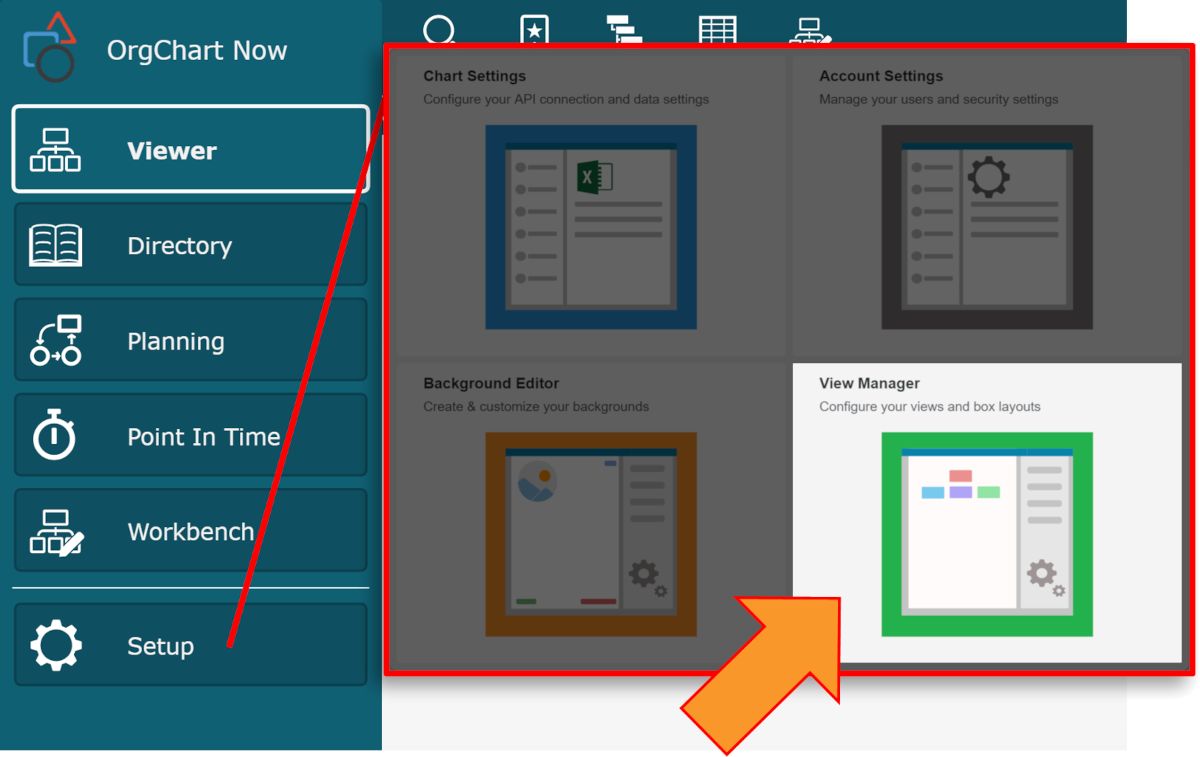
Accessing the Rules Editor
Click on the Mode Switcher icon in the Top Toolbar, and then select the Setup option. The Setup panel is displayed.
Click on the View Manager option. The View Manager user interface is displayed.
Click on the Rules button. The Rules panel is displayed to the left of the screen.
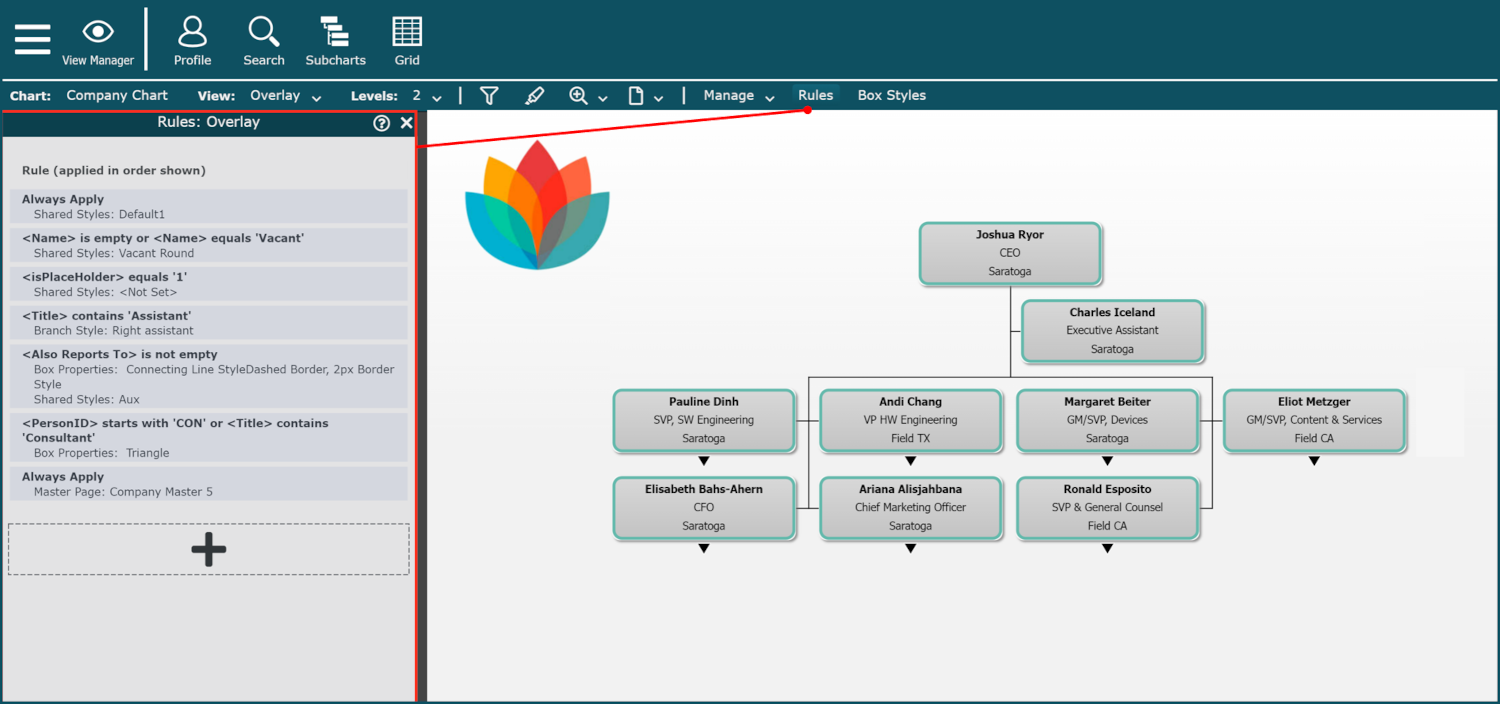
Click on the  icon (at the bottom of the list of Rules), or right click on an existing rule, and then select the Edit option.
The Rule Editor is displayed.
Rule Types
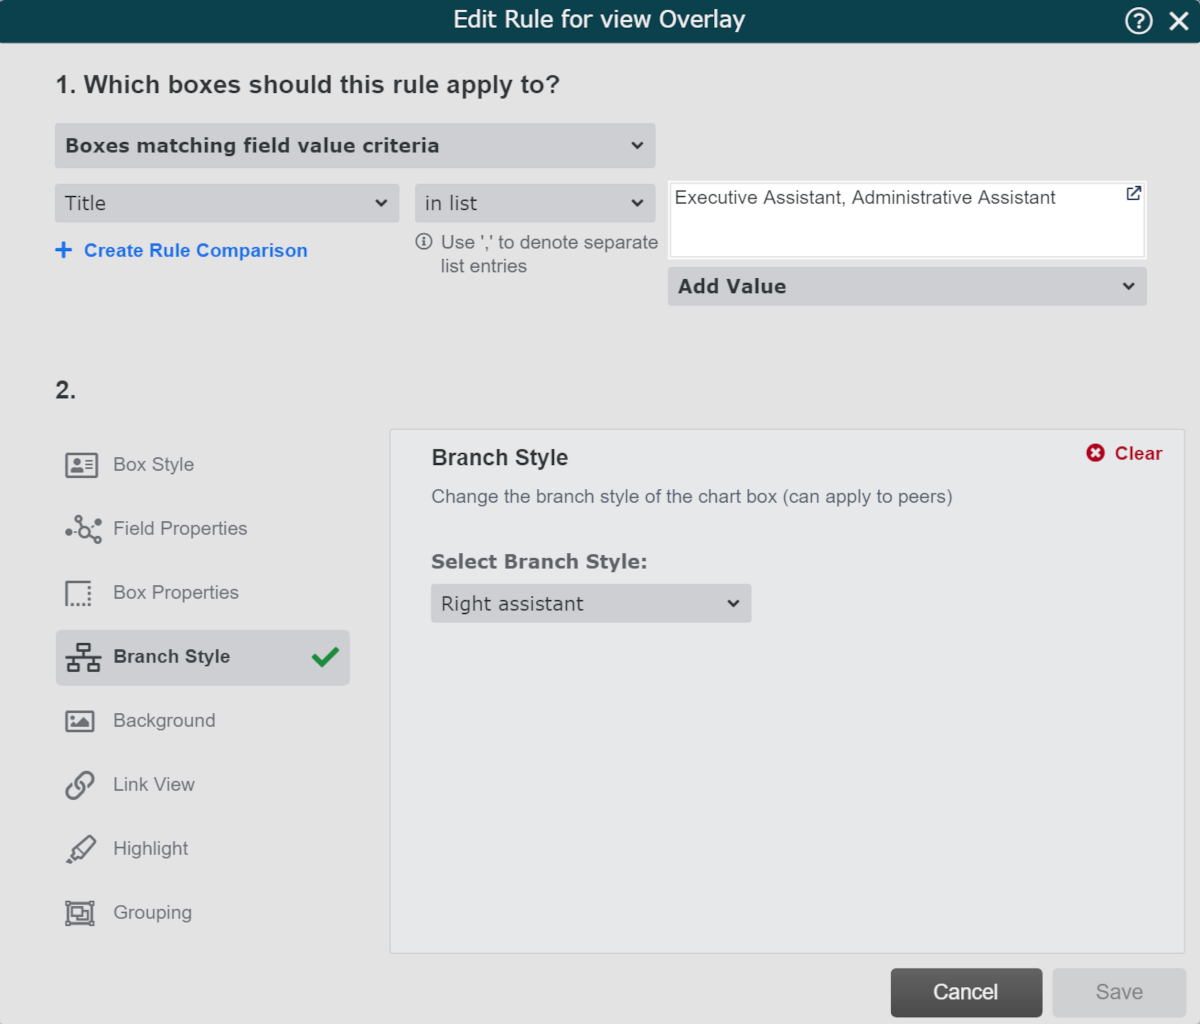
Select a Rule Type from the first dropdown menu under the question "Which boxes should this rule apply to?".
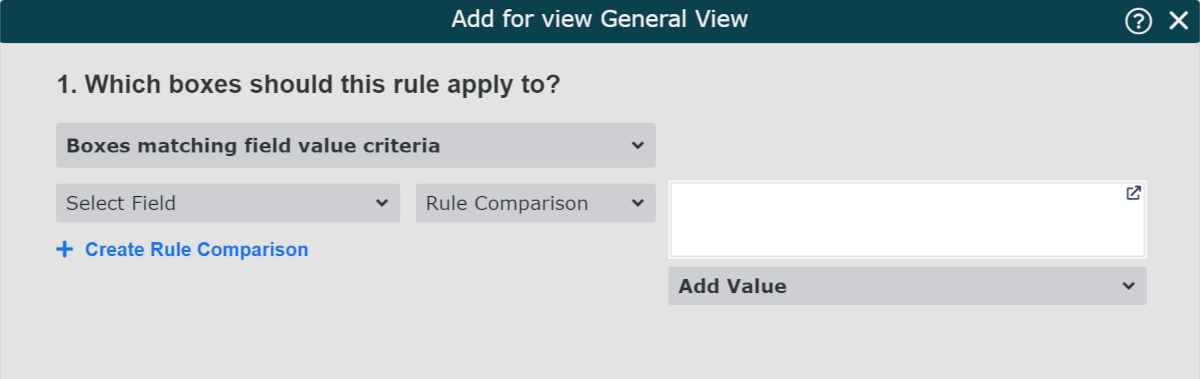
OrgChart has three Rule Types:
All Boxes - Apply the selected presentation options to the entire chart.
Boxes matching field value criteria - Apply the selected presentation options to boxes that match the defined criteria.
Boxes matching custom logic (advanced) - Apply the selected presentation options to boxes that match a logic written in a similar format to java script.
Rule Criteria
Rule criteria is defined using the Field dropdown, Comparison dropdown, and Value text box.
Create a compound rule using an AND (&) or OR (||) operator by clicking on the + Create Rule Comparison option.
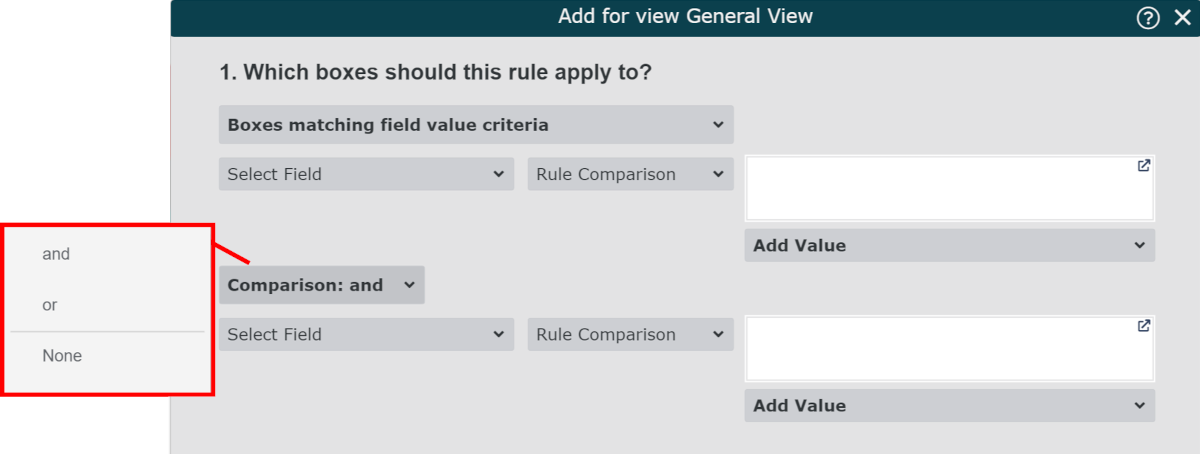
To delete the second portion of your compound rule, click on the Comparison dropdown, and then select the None option.
Presentation Options
The 8 tabs on the left side of the Rule Editor contain different presentation options that can be applied in a Rule.
When employee records match the defined Rule criteria, the presentation options are applied.
The following presentation options are available:
Basic Styles
Box Style Library | System - Select a system created Box Style from the System Library. Shared -Select a user-created Box Style from the Shared Library. |
Box Style to Apply dropdown | Select a Box Style from the dropdown menu. The Box Style Library selected above will spawn the associated Box Styles. |
Field Properties
The following options pertain to the presentation of the field selected in the Field dropdown menu.
Field dropdown | Select a Field to alter its presentation in the applied Box Style. |
Set Font Color | Click to change the color of the font. |
Set Fill Color | Click to change the color of the cell fill. |
Set Text Style | Click to select the text style (Bold, Italics, or Underlined). |
Hide Field | Do not show selected field in the Box Style applied to the View. |
Box Properties
The following options pertain to the presentation of the box style that is applied.
Box Shape | Change the shape of the box. |
Border Style | Change the thickness and style of the box. |
Connecting Line Style | Change the thickness and style of the lines connected to the box. |
Box Flag | Add and modify a flag applied to the box. |
Box Color | Change the fill color of the box. |
Border Color | Change the color of the box's border. |
Connecting Line Color | Change the color of the lines connected to the box. |
Branch Style
Select Branch Style dropdown | Select a style to apply to the branch (i.e Right Assistant) that meets the Rule criteria. |
Background
Apply Background dropdown | Select a Background from the list to apply to the chart. Optionally, use this option when creating a Basic Rule or Complex Rule to apply the selected Master Page when the top box of the subchart matches the Rule criteria. |
Link View
Linked View dropdown | Select a previously made View to link to the current View. |
Highlight
Highlight Color | Select a highlight color to apply to boxes that match the rule criteria. |
Grouping
Container Box Style | Select a box style to apply around the grouped boxes. |
Apply Box Style to Members | Select a box style to apply to the members of the defined group. |
Sub-Group by Field | Add another field (i.e. Location) to further group employee records. |
Minimum Group Size | Select the minimum amount of employee records that can be included in a group. If the number of employee records that meet the Grouping Rule criteria is less than the minimum amount, these records will not be grouped. |
Allow Groups with Managers checkbox | Check to allow employee records with direct reports to be grouped. |
Clear Existing Groups checkbox | Clear the any grouping that occurs earlier in the chart template. |