Auxiliary Reporting
Audience:
Audience: Administrators
Overview
When an employee has more than one manager, Administrators can configure auxiliary reporting in OrgChart, even if the main HRIS data does not support dual-reporting. The following article provides step-by-step instructions for displaying auxiliary relationships in OrgChart.
Configuring Auxiliary Reporting
The following section provides step-by-step instruction for configuring auxiliary reporting in OrgChart when it already exists in your HRIS.
Log in to OrgChart.
Click on the Mode Switcher icon in the Top Toolbar, and then select the Setup option. The Setup panel is displayed.
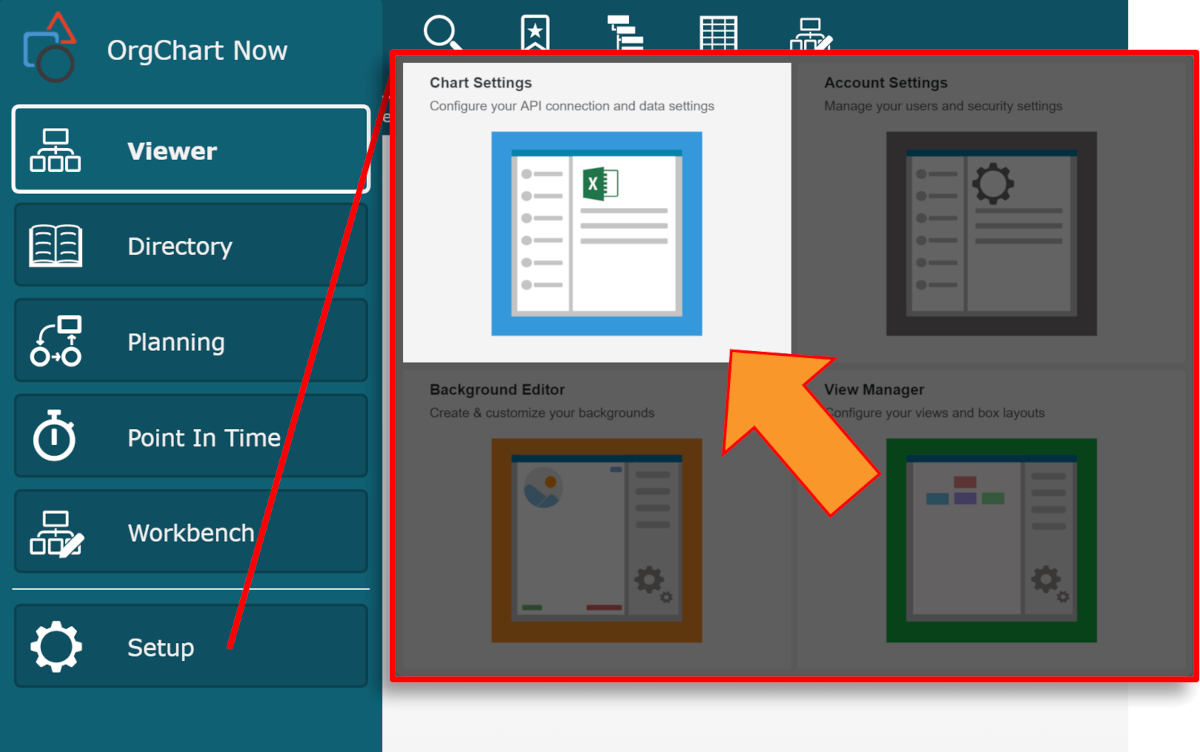
Click on the Chart Settings tile, and then click on the Mapping option in the left side panel.
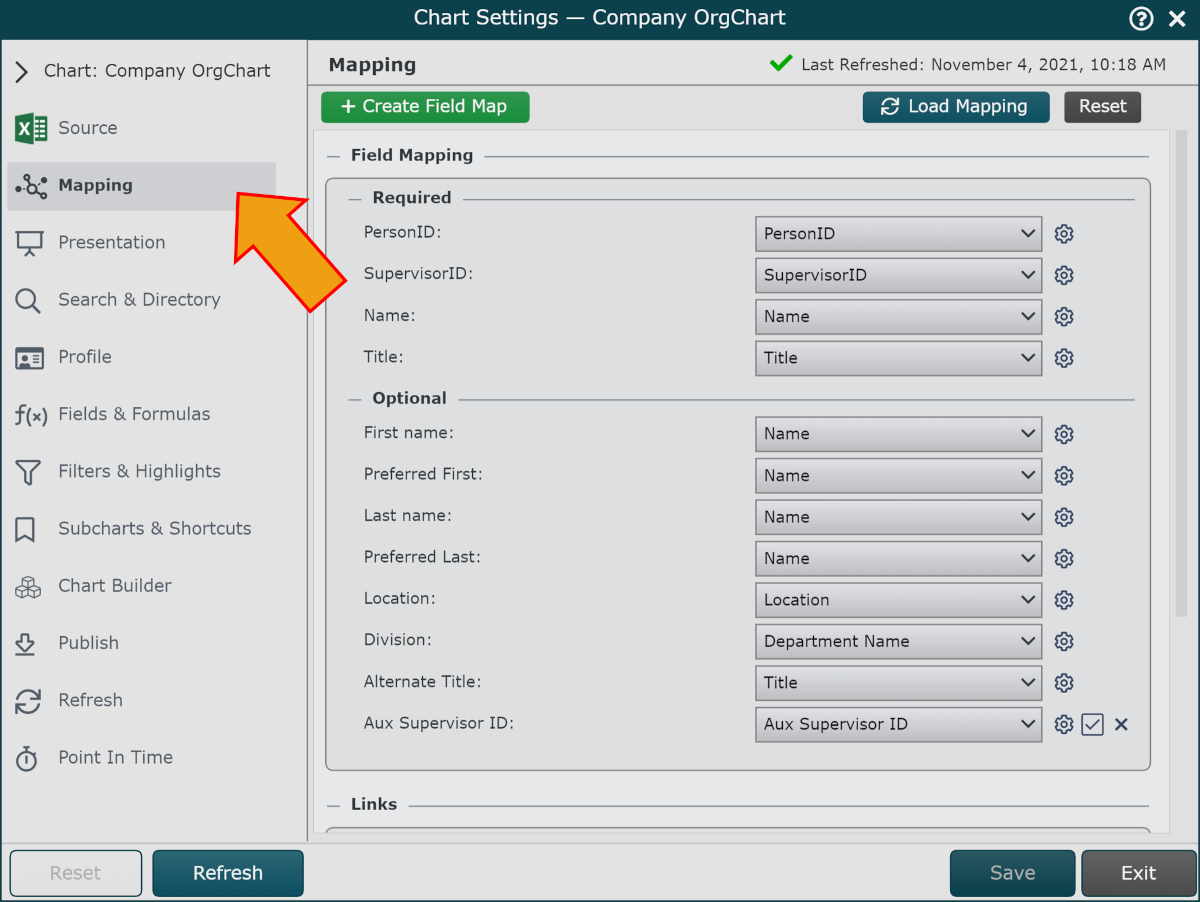
Click on the + New Mapping button (at the bottom of the mapped fields list), and then select the Aux Supervisor ID option.
Click on the Aux Supervisor ID dropdown menu, and then select the field name associated with this field mapping (i.e. Aux Supervisor ID).
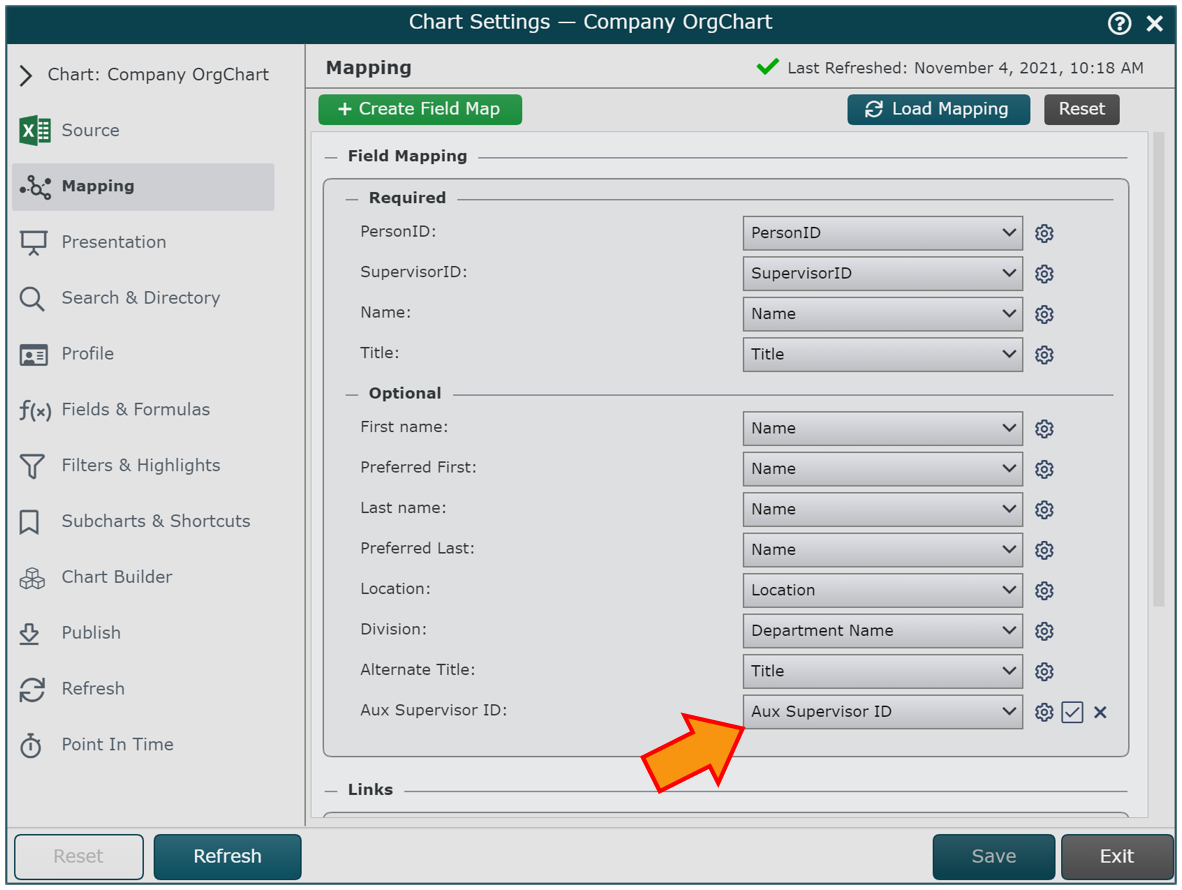
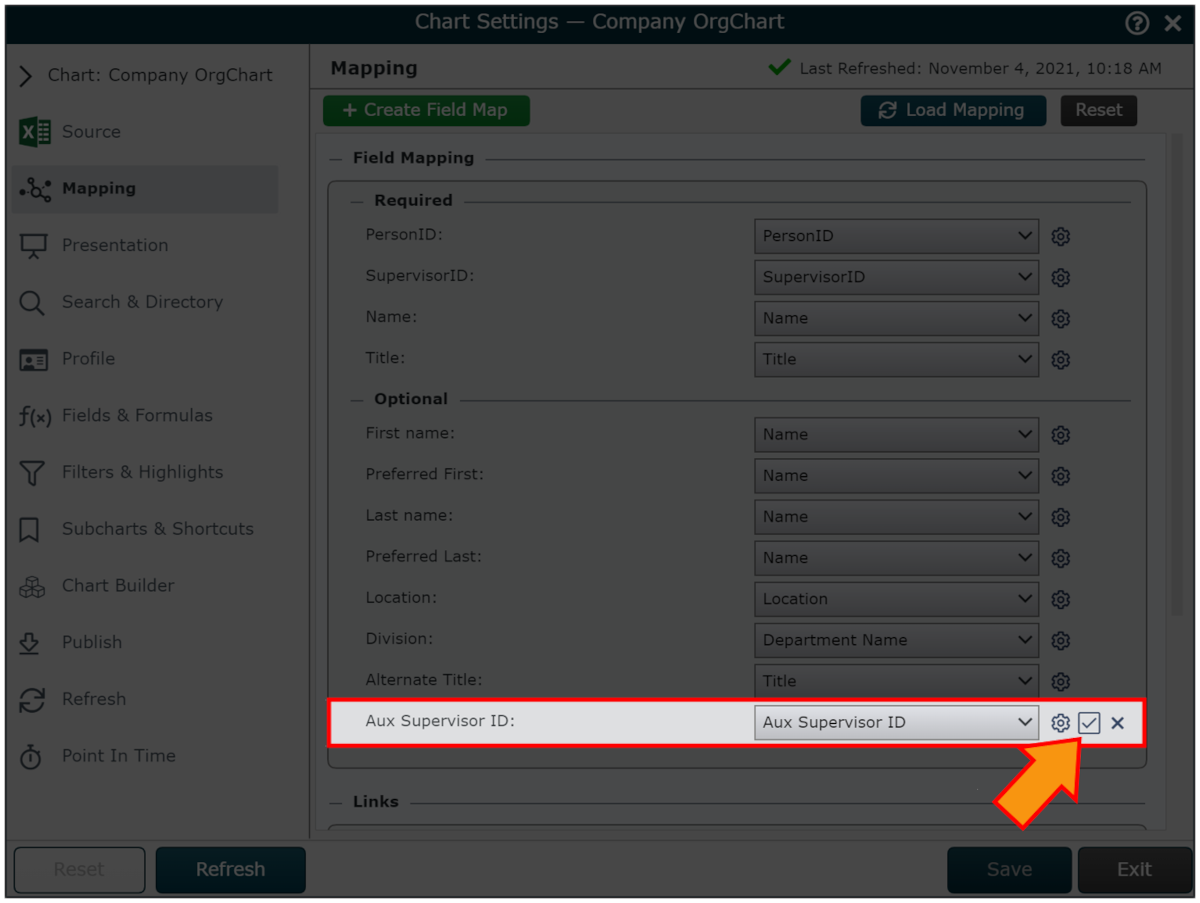
Optionally, check the checkbox to the right of the Aux Supervisor ID field to display one layer of an Auxiliary employee's direct reports. See the Additional Options section below for more information.
Click on Save, and then Refresh. OrgChart duplicates the employee record of the auxiliary report, so that their record appears under each of their supervisors.
Note
Note: Auxiliary reports will not affect the total headcount of your organization.
Optionally, read the Formatting Auxiliary Reports section below for instructions on targeting auxiliary employees with conditional formatting.
Additional Options
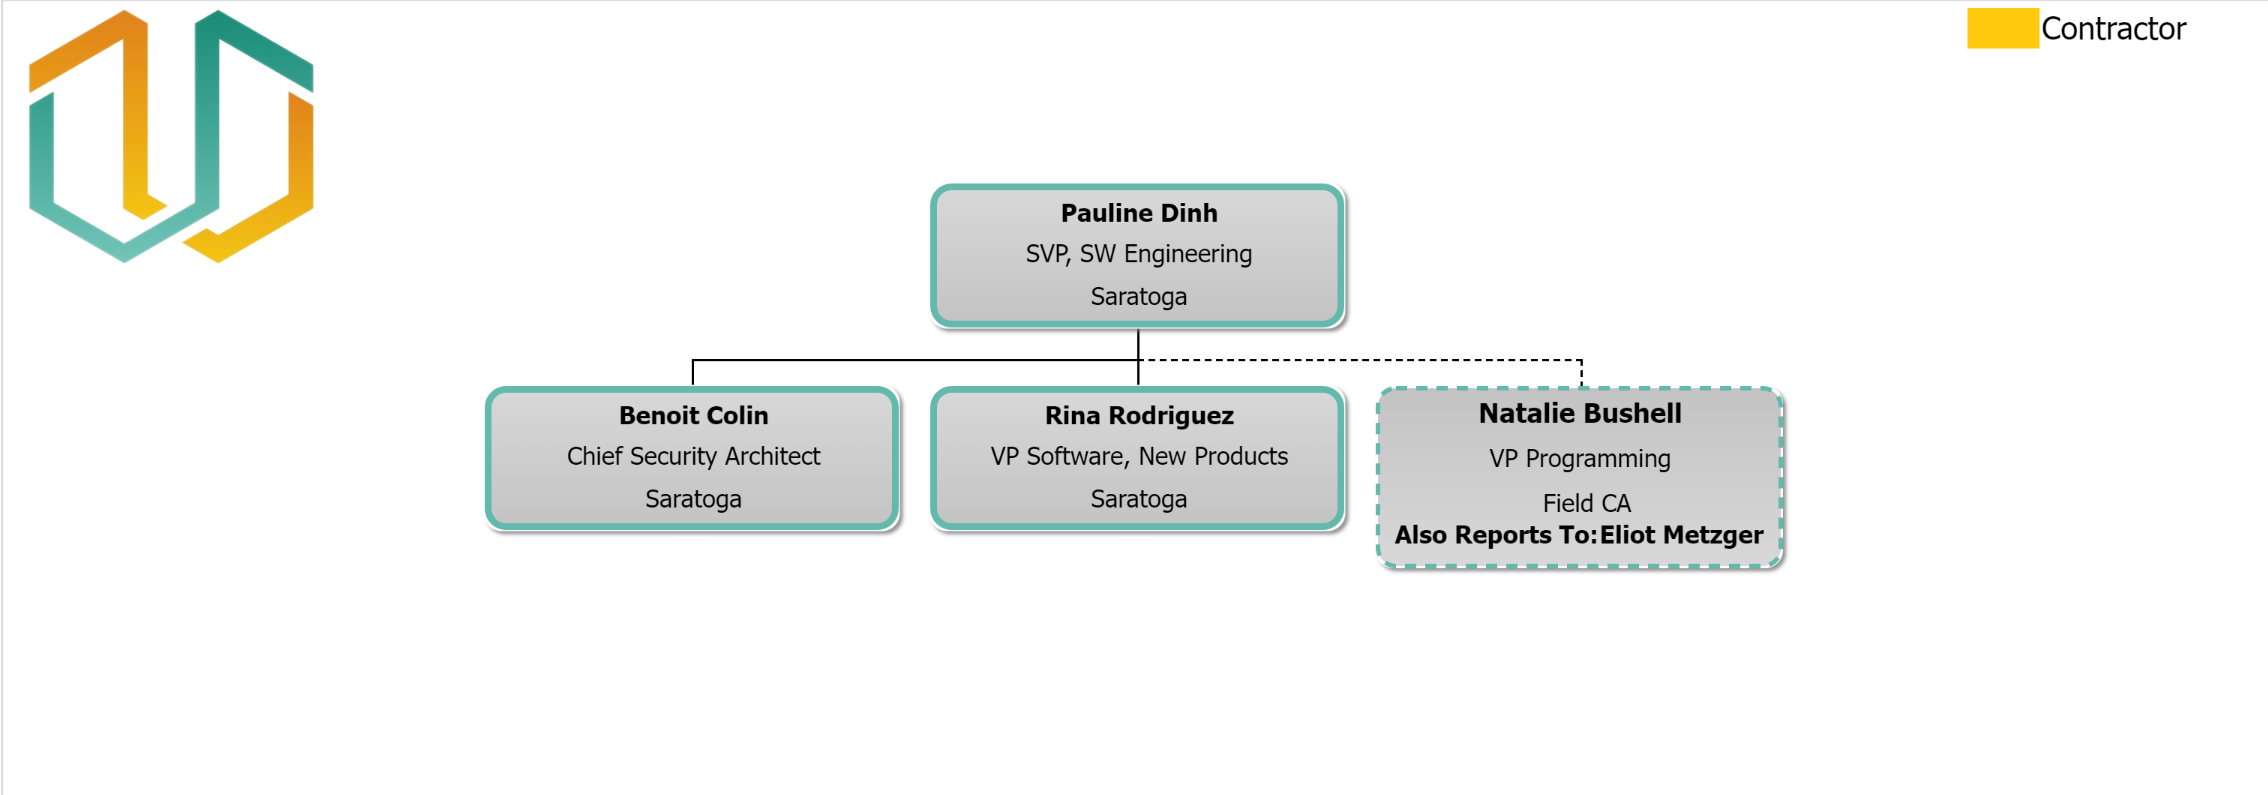
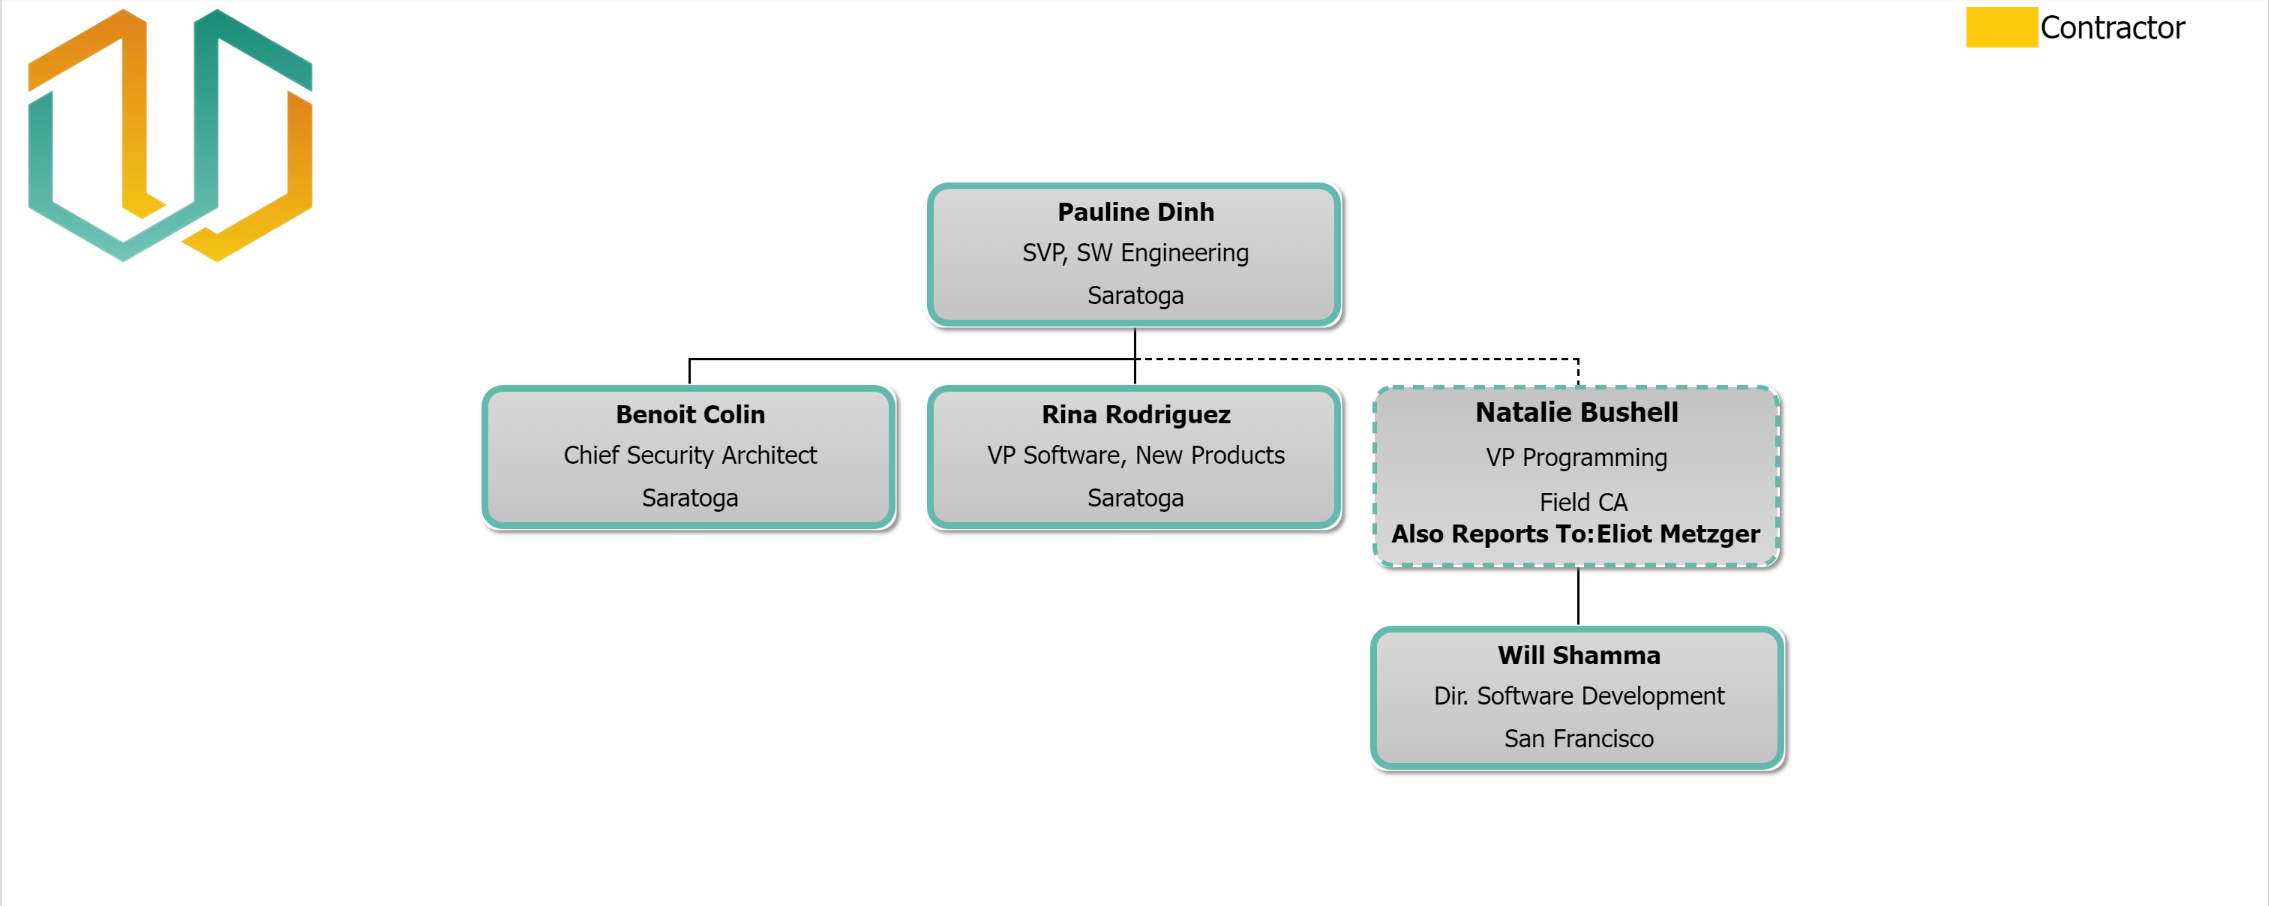
If desired, you can display up to one layer of an auxiliary employee's direct reports. To do so, check the checkbox to the right of the Aux Supervisor ID field, as shown below.
Without Aux Employee's Direct Reports
With Aux Employee's Direct Reports
Merging Auxiliary Reporting
If your HRIS does not support Auxiliary Reporting, you can use a Merge File (Excel or CSV) to represent dual-reporting in OrgChart.
Log in to OrgChart.
Click on the Export icon, and then select Excel.
Select This Page from the list of options. The Excel file begins to download.
Open the Excel file after the download is completed.
Delete all rows with employee data.
Delete all columns with the exception of the field mapped to PersonID. If you are unsure which field in your data maps to PersonID, verify your mapping configuration in the Chart Settings: Mapping panel.
Add a column header called Aux Supervisor ID.
Optionally, add a column called Info for your reference.
Enter the PersonID for the employee who has more than one manager in the PersonID column.
Note
Note: You can find an employees PersonID by clicking on an employee record, and then clicking on the Profile icon. If the Profile icon does not contain PersonID, add the PersonID field to the Profile in the Chart Settings: Profile panel.
Enter the PersonID for the secondary manager in the Aux Supervisor ID column.
Optionally, add a note about the entry (for your future reference) in the Info column.

Click on File, and then click on Save As.
Save this document using the following naming convention: CompanyName_AuxMerge.
In OrgChart, click on the Mode Switcher icon in the Top Toolbar, and then select the Setup option. The Setup panel is displayed.
Click on the Chart Settings tile. The Source panel is displayed.
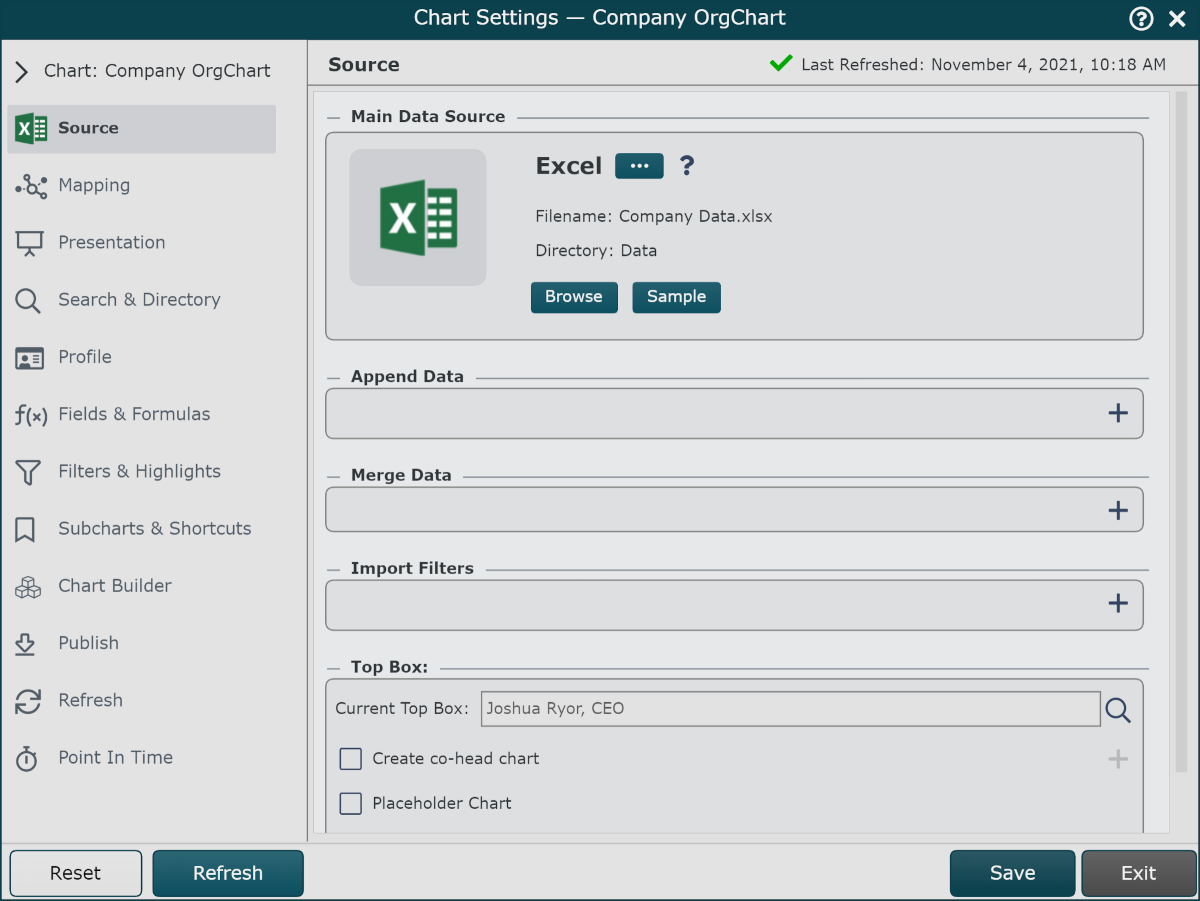
Click on the
 icon (under the Merge Data heading). The List of Merge Data Connectors is displayed.
Click on the Excel icon, and then click on Select. The Excel icon is displayed under the Merge Data heading.
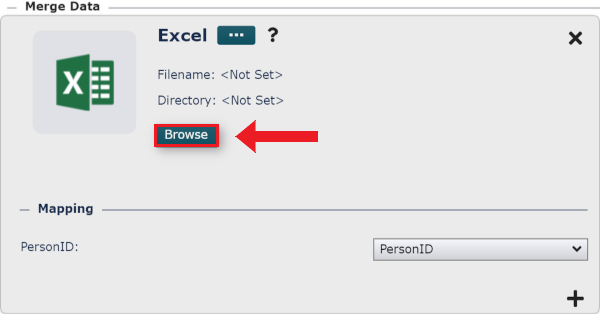
Click on the Browse button (associated with the Excel icon). The File Picker is displayed.
Select the Data folder (from the right hand column), and then click on the
 icon (in the upper-right corner).
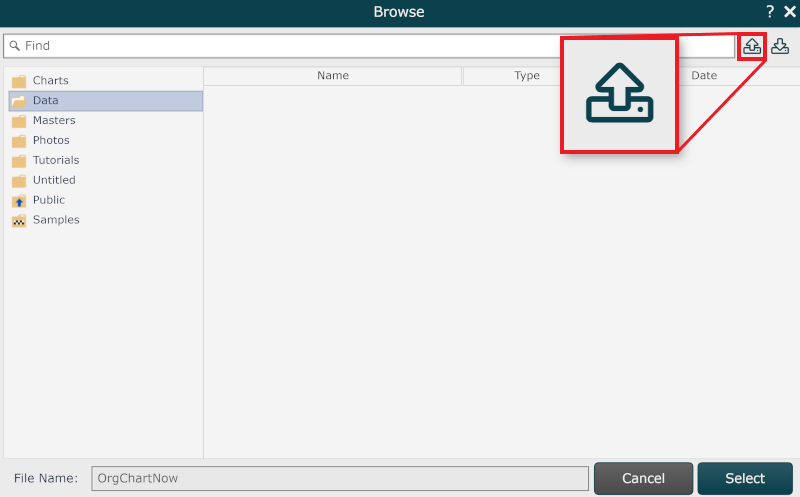
Search for and select the Aux Merge file (saved in step 13), and then click on Open. The file is imported into OrgChart.
Click to highlight the Aux Merge file, and then click on Select.
Click on Save, and then Refresh.
Follow the steps outlined in the Configuring Auxiliary Reporting section above to finish merging Auxiliary Reports into OrgChart.
Formatting Auxiliary Reports
Design a Box Style specifically for auxiliary reports, and then use conditional formatting to identify these employees. The following section provides some ideas for formatting auxiliary boxes. Reference the Box Layout Editor and Rule-Driven Charting articles for more information.
Log in to Org Chart.
Click on the Mode Switcher icon in the Top Toolbar, and then select the Setup option. The Setup panel is displayed.
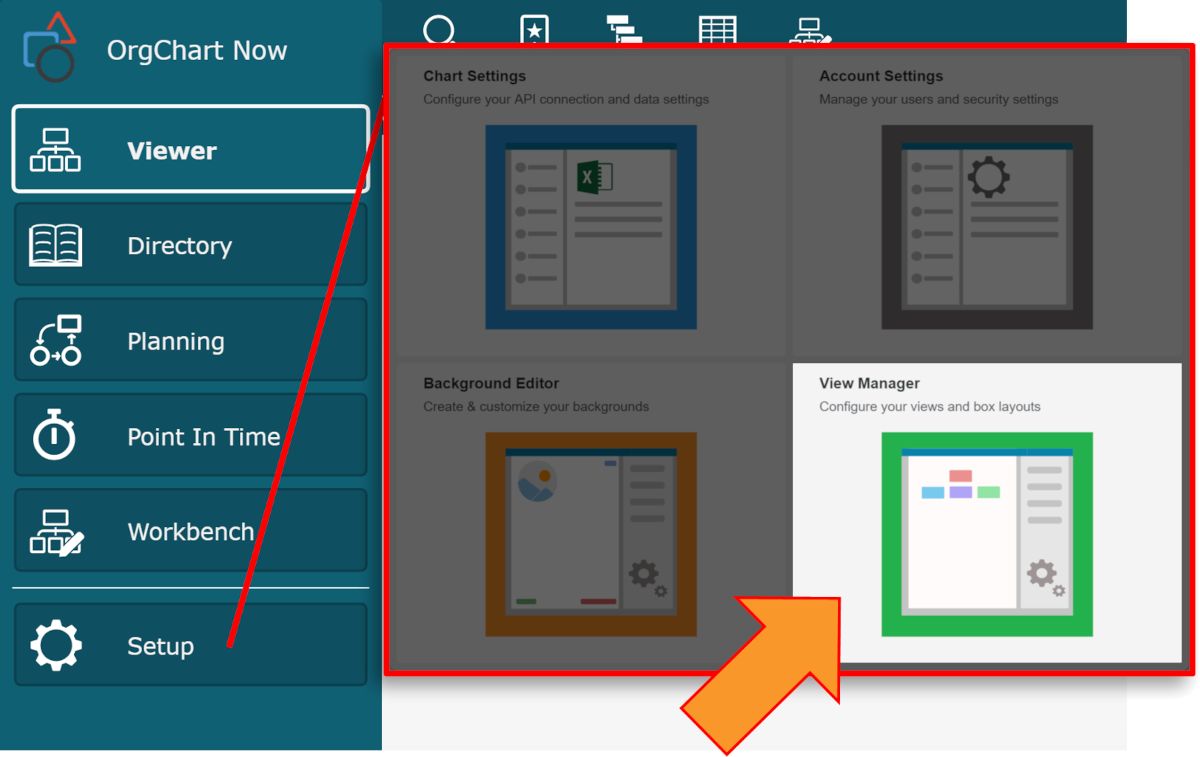
Click on the View Manager option. The View Manager user interface is displayed.
Click on the Box Styles button to expand the Box Styles panel.
Click on the Shared Styles tab (at the top of the Box Styles side panel).
Click on the
 icon to add a new Shared Box Style, and then rename it "Aux."
Right-click the newly added Box Style, and then select the
 icon. The Box Layout Editor is displayed.
Click on the bottom cell of the box.
Click on the
 icon (in the top tool bar) to add a new row below the selected cell.
Right-click within the newly added cell, and then type "Also Reports To."
Click on this field to add it to the box.
Note
Note: Once applied to the chart, users can click on the Also Reports To field, and jump to the listed supervisor's subchart.
Optionally, with the Also Reports To cell highlighted, click on the
 icon (in the top tool bar), and then select the Label:Value option. Then click on the
  icon (in the top tool bar) to align the text to both the left and right margins.
Click on the Save button. The Box Style is added to the Shared Box Styles Library.
Click on the
 icon (at the top of the right side panel).
Click on the Rules button to expand the Rules panel.
Select the View (to which you would like to add the auxiliary box style) from the View dropdown menu.
Click on the
icon at the bottom of the Rules list to add a new rule.Configure a rule that targets the auxiliary report (see examples below), and then click on OK.
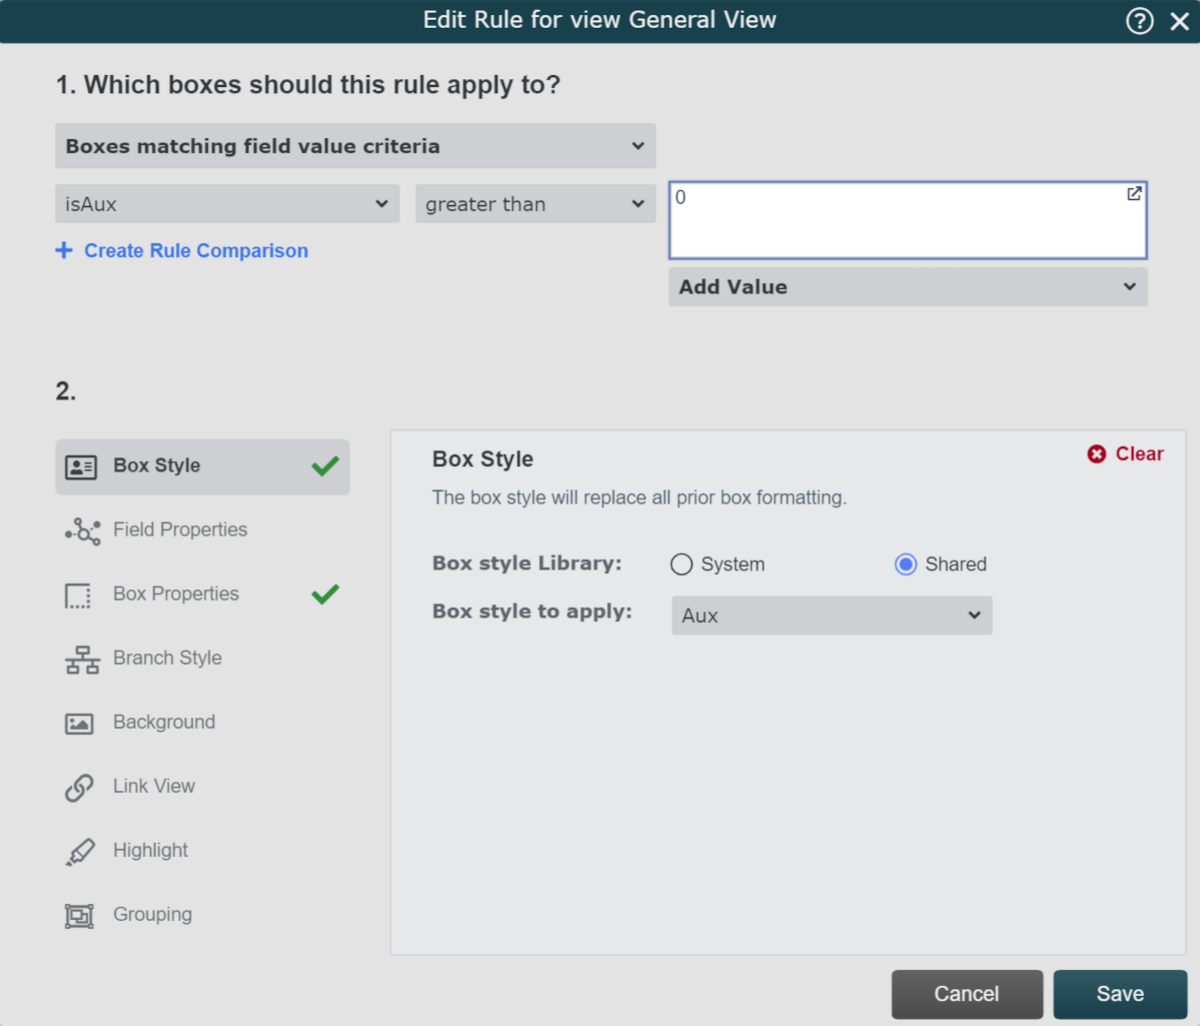
isAux - Use the system generated isAux field to apply a certain box style to records whose isAux field value is greater than 0. This rule is applied to only the auxiliary record(s) of auxiliary employees.
Example Rule:
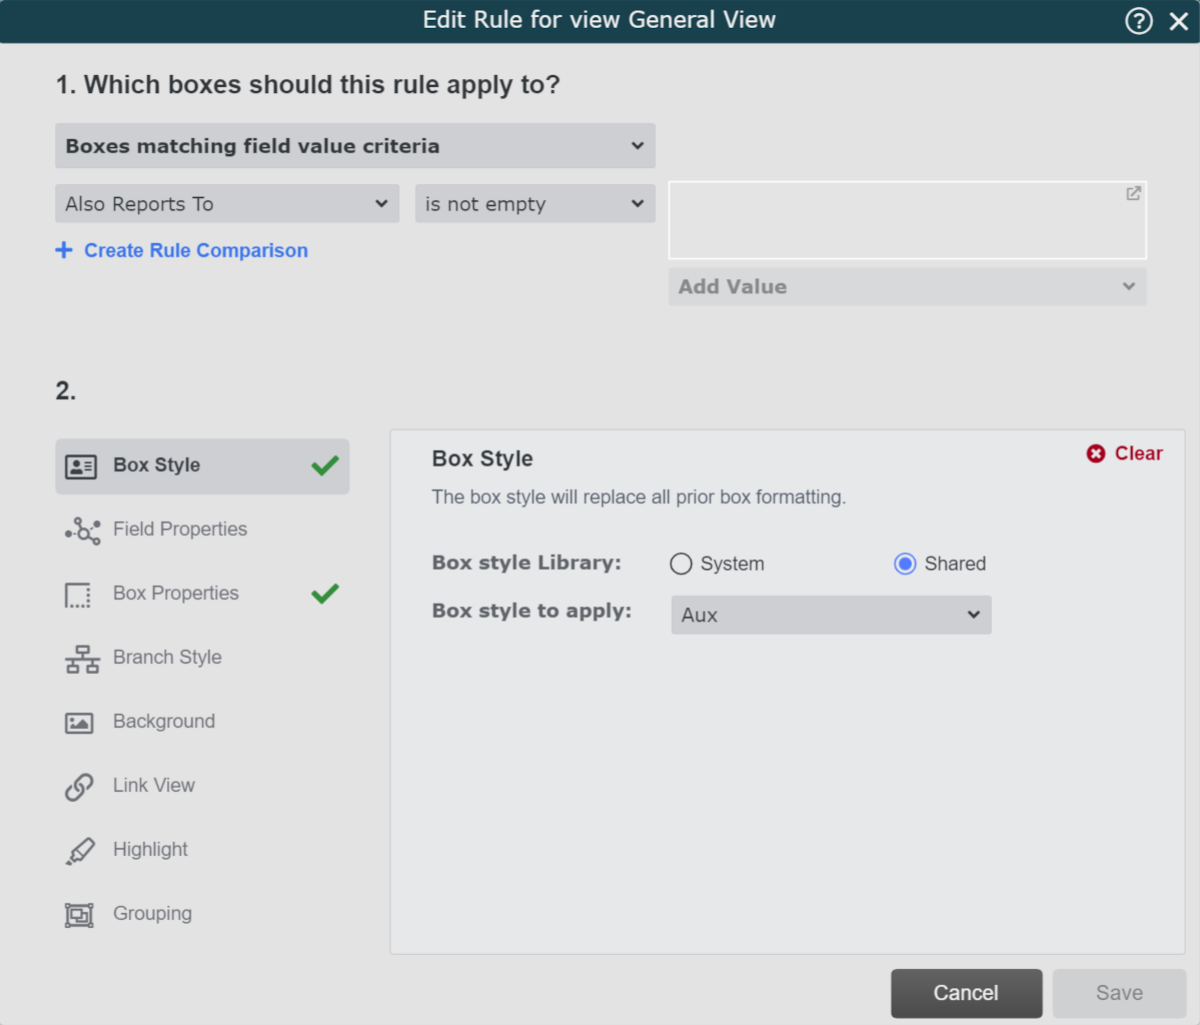
Also Reports To - Use the system generated Also Reports To field to to apply a certain box style to records whose Also Reports To field is not empty. This rule is applied to the standard record and auxiliary record for each auxiliary employee.
Example Rule:
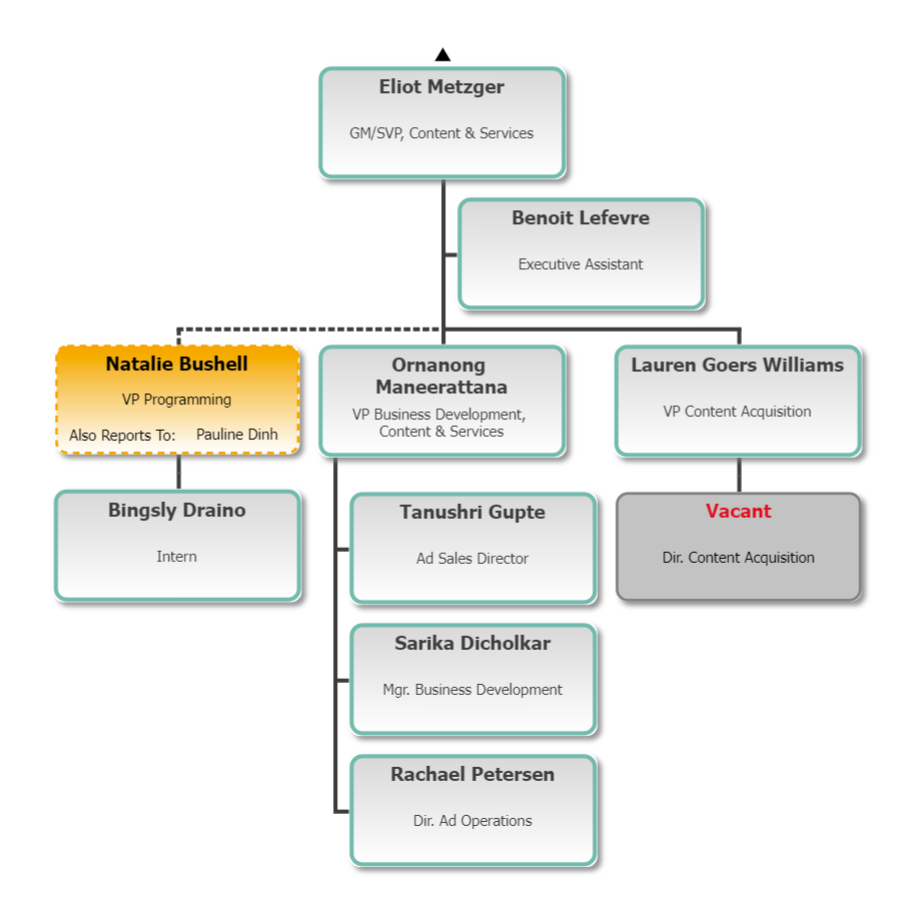
Optionally, click on the Box Properties tab to further edit the presentation of the Aux box. The following example uses a dashed connecting line, as well as a dashed border.
Click on the Manage menu, and then select the Save View option from the dropdown. Admin can link the View to the Master Chart, or add it to the list of Views in the Chart Settings: Presentation panel.